“Windows 10 can’t connect to this network” is one of the common issues Windows users face when trying to connect to a network. Also, telling you that the can’t connect error doesn’t explain much more. This makes it difficult to resolve the error.
How does Windows 10 fix not connecting to this network? To help solve the problem of not being able to connect to the network, we will list 7 best methods. Using them one by one, you can easily fix the problem and connect to the network of your choice on your PC.
Tips:
To optimize your PC and fix various PC-related issues, we recommend using an advanced system optimizer.
This software helps in updating outdated drives, getting rid of malware infections, removing junk files, recovering accidentally deleted files, and more, thus helping to maximize system performance.
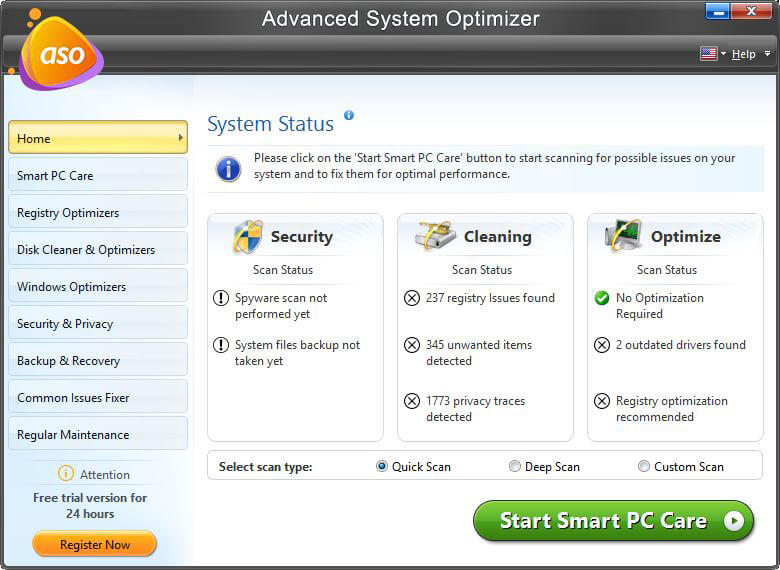
You can use it and fix PC issues in 3 easy steps:
1. Download, install, and run the Advanced System Optimizer
2. Click Launch SmartPC Care and look for Windows issues
3. To fix the detected errors, click Optimize Now.
Used by millions of users worldwide, this best PC optimizer and cleanup tool works flawlessly and helps solve almost all Windows-related issues.
Full review of the advanced system optimizer
How to Fix Windows 10 Network Connection Error?
Method 1 – Update the network adapter driver
Workaround for Windows not connecting to this network: Sometimes you may experience wireless network issues due to outdated network drivers. To fix this error, we need to update the driver in question
Note: To update the driver, you need a device with an active internet connection.
To update your network drivers, you can visit the manufacturer’s site or use the best driver update utility. After you download the driver, you can copy it to a USB and then install it on a device that encounters a can’t connect to network error.
Once you install the latest drivers, the problem will be resolved.
But doing this manually will be a time-consuming and tedious job. In addition, all users are not tech-savvy and may end up installing incorrect drivers. So, to avoid all this from happening, we recommend using an automatic driver update tool.
To do this, you can use the Driver Updater module provided by Advanced System Optimizer. To use it, follow these steps:
1. Download, install, and run the Advanced System Optimizer.
2. Launch the PC optimization software.
3. Click on Windows Optimizer and scan your PC for faulty or outdated drivers.
4. Update the network drivers and wait for the process to complete.
Note: To update all drivers, you must upgrade to the Pro version.
- After updating the drivers, restart the system to see if the error, unable to connect to the network issue has been resolved.
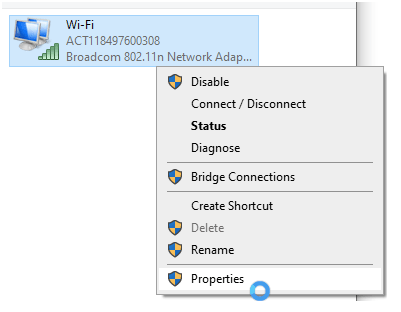
Method 2 – Uninstall the network adapter
How does Windows 10 fix not connecting to this network? Even if you cannot access the Internet after updating the driver, it is recommended to uninstall and reinstall the driver. To do this, follow these steps:
1. In Windows Search, enter Device Manager
2. Select the search results to open Device Manager.
3. Find the NIC and double-click to unhide the driver.
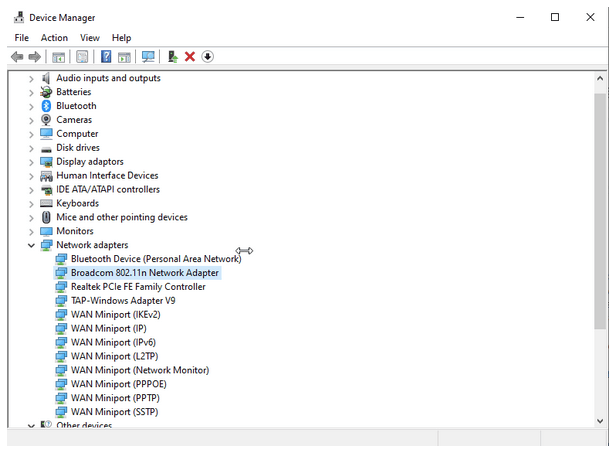
4. Select it, right-click on > uninstall the device
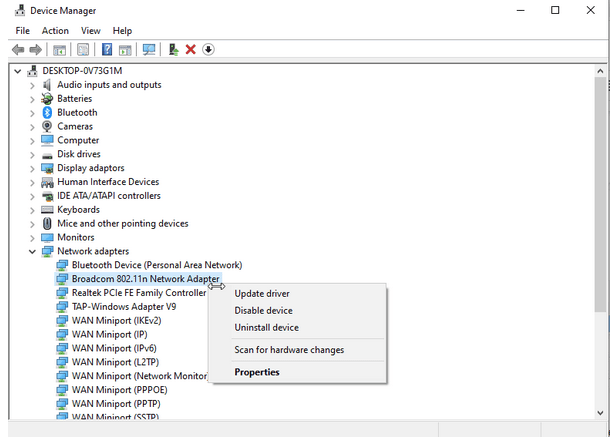
5. Reboot the system after uninstalling the driver, which will help Windows install the new network driver automatically.
Now try to check your PC error should be resolved. If not, let’s move on to the next step.
Method 3 – Change the channel settings of the network adapter
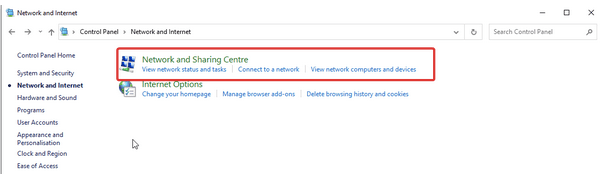
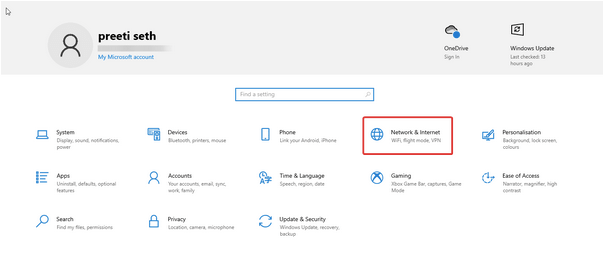
1. Enter Control Panel in the Windows search bar
2. Click Network & Internet
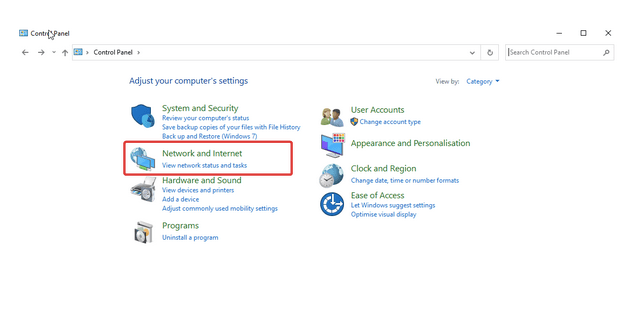
3. Network & Sharing Center
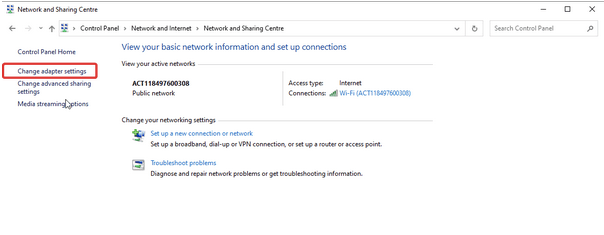
4. Change the adapter settings
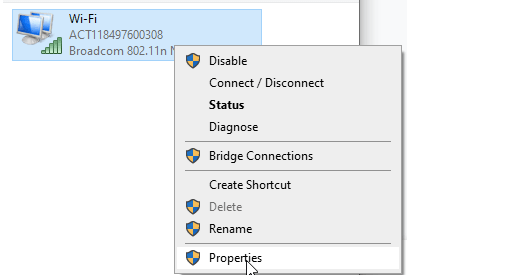
5. Find your wireless adapter > right-click on the > properties
6. Click the Configuration > Advanced tab.
7. Select 802.11 Channel Width and edit the value. (Changing the value to 20 MHz has helped several users.) )
8. Click OK to save your changes
Method 4 – Forget about the network and reconnect to it
How does Windows 10 fix not connecting to this network? The idea of forgetting about the network and reconnecting may sound lame to some users, but most of the time this obvious step is overlooked. So, if all the steps have not worked so far, there is no harm in using this fix.
To learn how to do this, follow these steps:
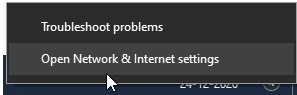
1. Go to the system tray and look for the network icon.
2. Right-click > to open Network & Internet Settings.
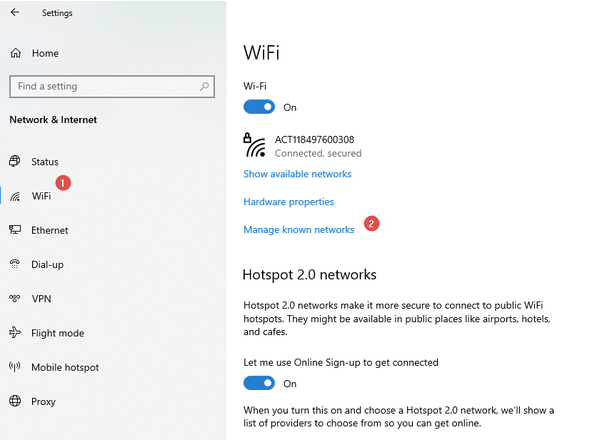
3. Click on the Wi-Fi option in the left sidebar and look at the wireless adapter.
4. Next, click Manage Known Networks and view all networks.
5. You can now see a list of all the networks you’ve ever connected to. Click on the > you’re having trouble with, right-click on the Forget button
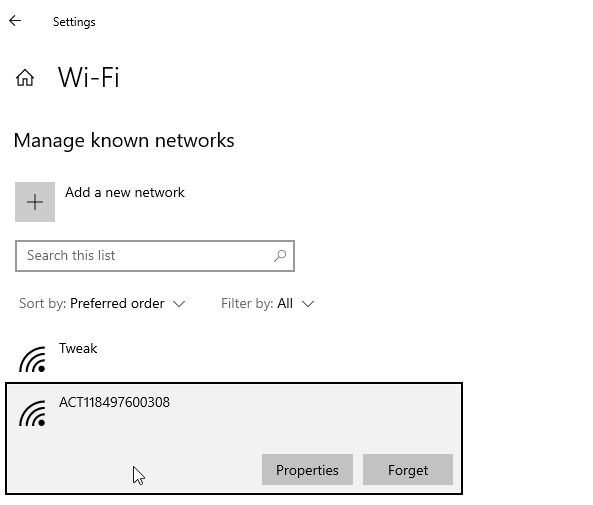
6. This will remove the network from the list. Reconnect scans > Enter your password and try to connect to the network.
Method 5 – Enable Disable Airplane Mode
Workaround for Windows not connecting to this network: It is recommended to use your smartphone to switch airplane mode when you encounter network problems, and you can also do it in Windows when you encounter “Windows 10 can’t connect to this network”.
To learn how to do this, follow these steps:
1. Click the notification-like icon in the lower-right corner to open the Windows Action Center
2. Click on the Airplane Mode option and turn it on.
3. Wait for a minute after enabling it and then disable it.
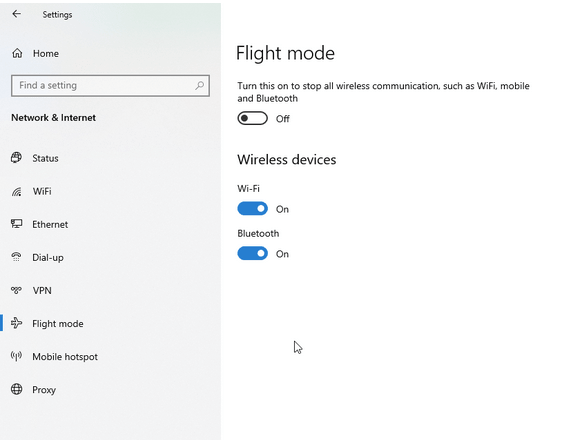
4. The problem of reconnecting to your network should now be resolved
Method 6 – Run the CMD command to resolve the issue
Workaround for Windows unable to connect to this network: The “Unable to connect to network” error may be due to IP address conflicts or DNS caches. To resolve such issues, Microsoft recommends freeing the IP address and refreshing the DNS cache.
To learn how to do this, follow the steps below
- Open an elevated Command Prompt
- Next, in the command prompt window, copy and paste the following commands one after the other. Make sure to press Enter after entering each command.
netsh winsock resetnetsh int IP resetipconfig /releaseipconfig /renewipconfig /flushdns
3. Let the command run and then reboot the system, which should fix the network not connected error on Windows.
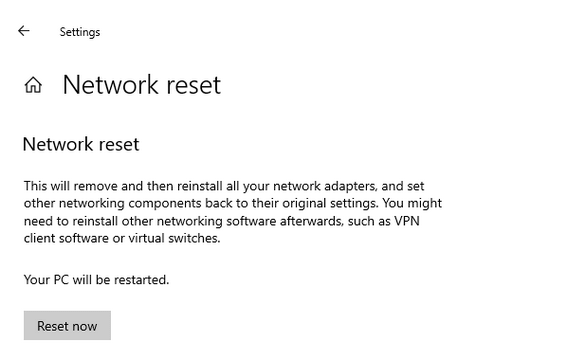
Method 7 – Reset your network settings
Incorrect network configuration can also cause “Windows 10 can’t connect to this network”. To fix it, resetting the network settings is the right decision.
To do this, follow these steps:
1. Press Windows + I
2. Look for network and internet options
3. Select Status from the left sidebar
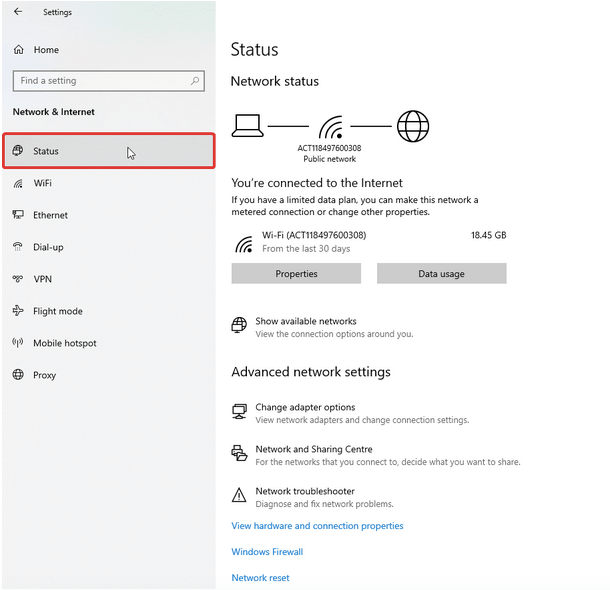
4. Scroll down and look for the Network Reset option.
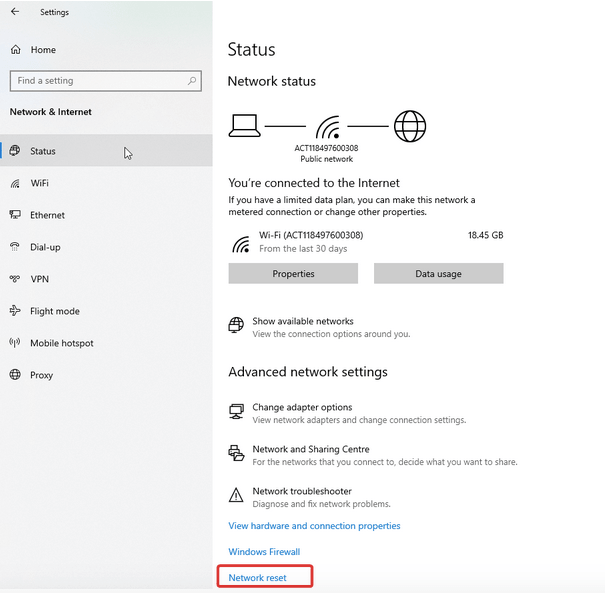
5. Click the Reset Now button to reset your settings.
Method 8 – Disable IPv6 on your PC
Workaround for Windows not connecting to this network: To fix the Windows 10 can’t connect to network error, try disabling IPv6 on your system. This won’t affect any system functionality unless you’re using the required IPv6.
1. Look for the network icon in the system tray.
2. Right-click > to open Network & Internet Settings.
3. Change the adapter options
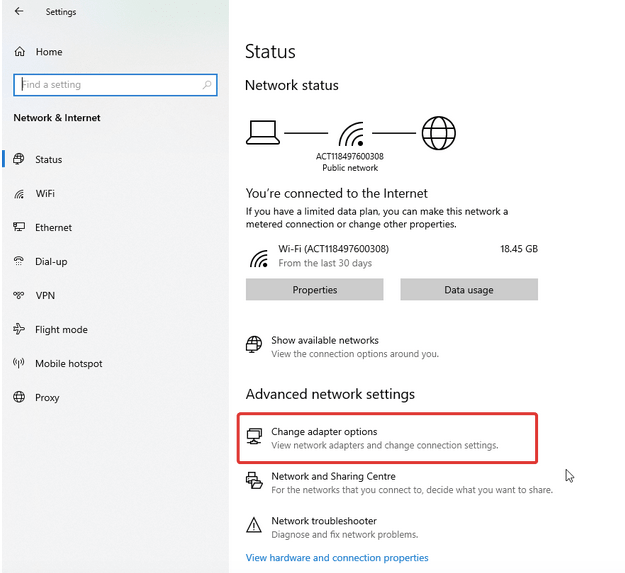
4. Look for the wireless name in the new window that opens, > right-click on > properties.
5. Uncheck the box next to Internet Protocol version 6 (TCP/IPv6). This will disable IPv6 > ok.

6. Check that the system issue should now be resolved.
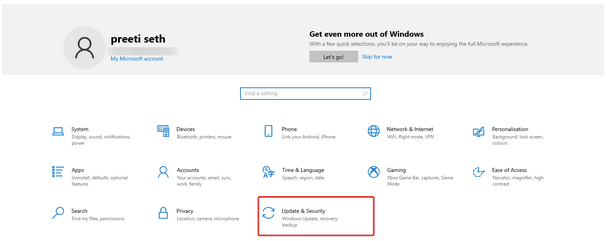
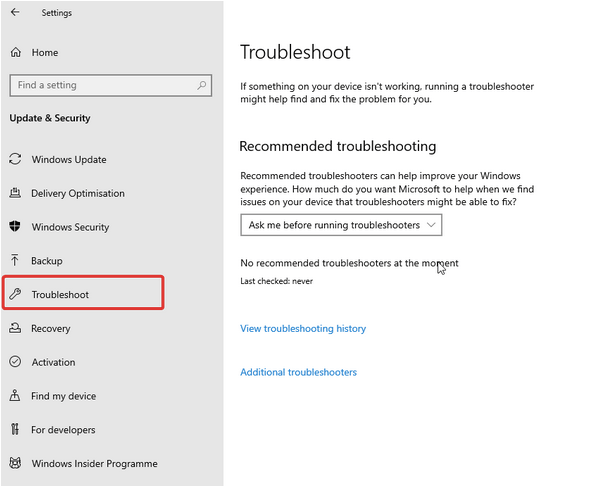
Method 9 – Use the Network troubleshooter
How does Windows 10 fix not connecting to this network? If nothing has worked so far, then the last resort is to use the built-in network troubleshooter. This will help solve the underlying problem. To use it, follow these steps:
1. Press Windows + I
2. Select Troubleshooter > Other Troubleshooter
3. The network adapter > run the troubleshooter
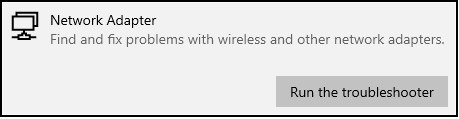
4. The troubleshooter will now look for the problem and fix it.
So, it’s all using a simple fix that you can easily fix: “Windows can’t connect to this network” and can connect to the Internet again. If you can’t fix the problem with the best fixes above, let us know in the comments section. Other than that, those who can solve the problem, please let us know which one works for you in the comment section.