How do I enable Active Directory in Windows 10? If you’re using Windows and want to know how to enable Active Directory for administration, then you’re going to have to install some software. Because Active Directory tools are not available on Windows systems. The Windows operating system is one of the most user-friendly operating systems in use today. In addition to a neat and clean user interface, it also offers some professional tools and services. One such service is Windows Active Directory, which is used to manage and connect servers, and this tool is very useful for professionals.
Even though Active Directory is a Windows tool, your Windows system doesn’t come with Active Directory preinstalled, especially if you’re using a version of Windows that isn’t professional. However, you can still use this tool on your Windows PC. I have briefly mentioned how to enable Active Directory on Windows 10, so if you need to install/enable Active Directory, read this article.
Installation steps for the remote server management tool
How to enable Active Directory for Windows 10: The first step is to install the remote server management tool from the official Microsoft Windows site.
Note: Make sure you have a good internet connection to download the file.
1. Launch your default Windows browser on your PC.
2. Now go to microsoft.com/en-us/download/details.aspx?id=45520
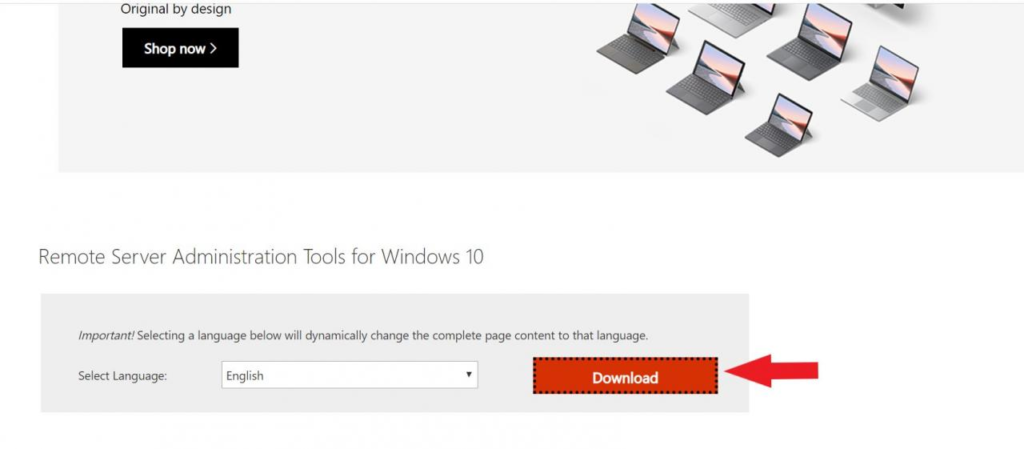
3. Now scroll down for a while until you see the red download button as shown below.

4. Click the download button.
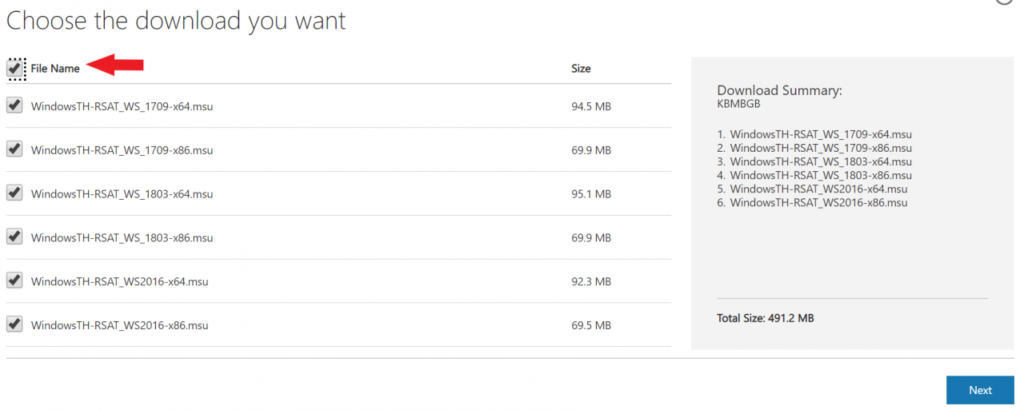
5. Next, click on the Filename box.

6. Now click on the Next button.
7. Now you need to wait unless the file is downloaded successfully.
8. Locate the files in your system.
9. Now install all the 4 different files that you just downloaded.
That’s it, you’ve successfully installed all the Remote Server Administrator tools needed to activate/enable Active Directory and thus passed the first level.
Here’s how to run commands using Active Directory.
How do I activate Active Directory?
How do I enable Active Directory in Windows 10? Now after installing the Remote Server Administrator tool, follow these steps to activate Active Directory:
1) Press the Windows + R button, type Control and press the Enter button
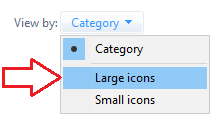
2) Click to move the mouse over the viewing method: and select the large icon

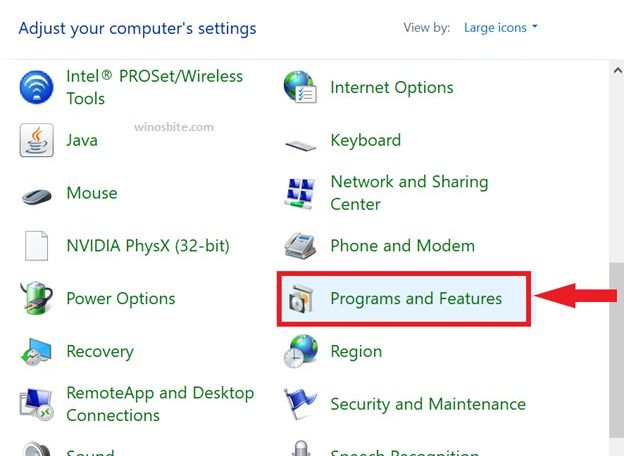
3) Now select the Programs & Features section in the Control Panel window.

4) Now tap on the option that says Turn on or off Windows features, located on the left side
5) Now find the Remote Server Administrator tool in the dialog box that pops up.
6) Click on the “+” sign in front of the Remote Server Administrator tool.
7) Now click on the “+” sign before Role Administration Tools in the extended list of tools.
8) Now check the AD DS toolbox
9) Now your Windows system will install some files.
10) Once the installation process is complete, you will get the Restart Now button, click on it.
That’s it, now get your system up and hopefully the Active Directory tool is enabled so you can use it effortlessly.
Hopefully, the above Windows 10 methods to enable Active Directory will help you activate Active Directory. If you have any issues with enabling Active Directory, you can let us know by leaving a comment below.