If you suddenly start experiencing issues with Google Chrome flickering in Windows 10, it can be very frustrating to use your computer and surf the web. Luckily, you don’t have to buy new hardware, and you can fix this problem by trying to make some tweaks on your computer.
There are four ways to fix this – two of them involve making changes in Chrome settings, one requires you to change Windows settings, and the last one requires you to use third-party software.
Method 1: Turn off “Smooth Scrolling” in Google Chrome
Workaround to Windows 10 Chrome flickering issue: Here are the steps to turn off smooth scrolling in Google Chrome.
Step 1: Launch the Google Chrome browser and open a new tab.
Step 2: In the address bar of the new tab at the top, enter “Chrome://flags”.
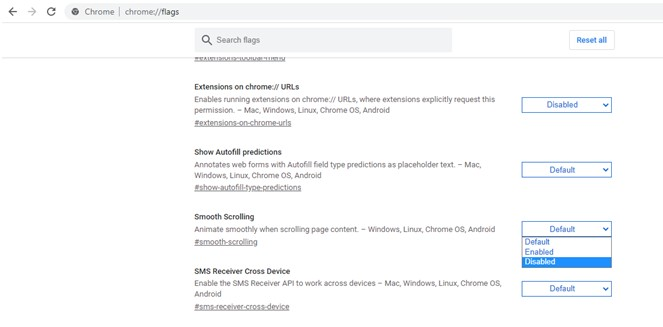
Step 3: A list of Chrome flags will be displayed. Scroll down and find the sign labeled Smooth Scroll.
Step 4: Next, select the drop-down menu next to it and then choose the Disable option.
Step 5: Click on the Restart option.
This method can fix Google Chrome flickering on Windows 10. Check to see if your issue is resolved, otherwise proceed to the next step.
Method 2: Disable “Use hardware acceleration when available”
How to fix Chrome flickering issue with Windows 10?The next step also involves changing another setting of Google Chrome and involves turning off hardware acceleration. The steps to resolve this issue are listed below:
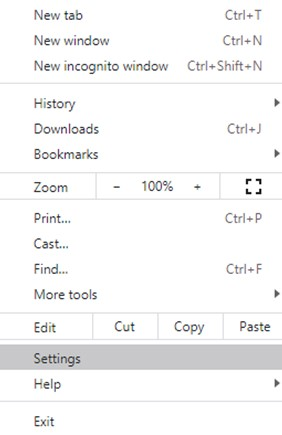
Step 1: Open Google Chrome and click on the three dots in the top right corner to see the drop-down options.
Step 2: Click on Settings and a new Settings tab will open.
Step 3: On the left panel of the Settings tab, click on “Advanced” to reveal more options and select “System”.
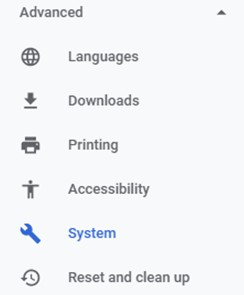
Step 4: Once you have successfully clicked on the system, you will see some of the options change on the left side of your screen.
Step 5: Toggle the slider button next to “Use hardware acceleration when available” to the left to turn it off.

Step 6: Quit Chrome and restart it to check if the Google Chrome flickering issue in Windows 10 has been resolved.
Method 3: Fix the background and color
Workaround for Windows 10 Chrome flickering issues: This option involves changing the settings in your Windows 10 PC, and the steps to accomplish this are listed below.
Step 1: Press Windows + I to open the Settings window.
Step 2: Click on the Personalization option and select the background in the new window that opens on the left panel.
Step 3: Next, click on the drop-down menu in the background and select a solid color.
Step 4: This will ensure that a stable background is maintained on your desktop and consumes less resources. Now, double-check if you are still experiencing Google Chrome flickering on Windows 10.
Method 4: Update your graphics drivers
How to fix Chrome flickering issue on Windows 10?The last way to get rid of Google Chrome flickering issue on Windows 10 is to update your drivers. Drivers are small programs that communicate between hardware and software. There are two ways to update drivers: automatic and manual.
- Manual method. This method involves using a Microsoft built-in tool called Device Manager, which you can launch to run driver scans and update them based on the availability of updated drivers on Microsoft servers. This method requires a certain amount of technical skills and is time-consuming and effort-intensive. Here are the steps to update the driver using Device Manager:
Step 1: Press Windows + R to open the “Run” window and type “devmgmt.msc” in the search tab.
Step 2: Click “OK” and wait for the Device Manager window to open.
Step 3: Click on “Display Adapters” and then right-click on the graphics card listed below it.

Step 4: From the context menu, click on Update Driver and follow the options on the screen.
Device Manager will automatically search for the best drivers available and install them on your computer.
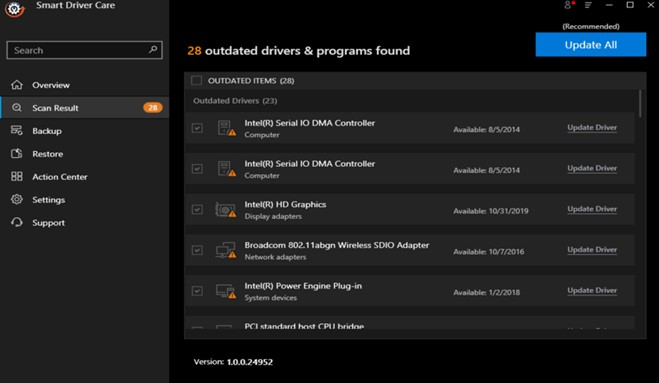
- Automatic method. The second method involves updating the software using a third-party tool or driver, such as Smart Driver Care. Personally, I have been using this app for a few years now and it has improved the performance of my system. With newer drivers, the system runs smoother and faster than before because the hardware and software can establish uninterrupted communication between them. Smart Driver Care finds outdated, missing, and corrupted drivers and replaces them with updates, updates, and the most compatible drivers from the Internet. Here are the steps to use Smart Driver Care:
Step 1: Download and install Smart Driver Care from the official website or the link below.
Step 2: Launch the app and start the registration process.
Step 3: Now, click on Scan Now to start the scan and identify the driver issues in your system.
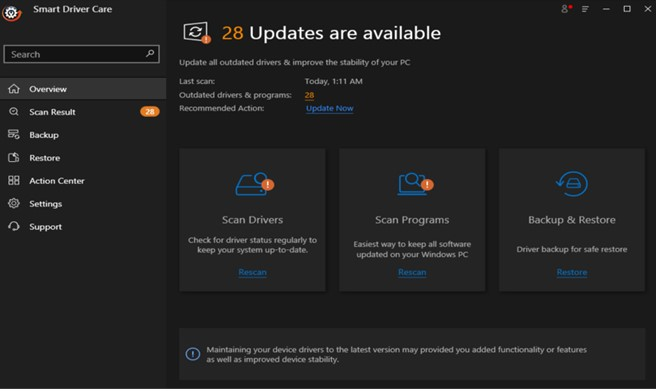
Step 4: Next, click on the Update All button to fix the driver issue and update all the drivers in your system.
Note: After you install and register your app for the first time, you only need to follow steps 3 and 4 each time.
Smart Driver Care is an amazing program that updates all of your drivers at once.
Final Decision on How to Fix Google Chrome Flickering Issue on Windows 10?
It’s unbearable for me to see my screen flickering every few seconds or minutes. This can cause eye strain and headaches for many users, which is why many people consider replacing hardware to be the only and quick option. However, it is recommended that you try these fixes, especially with the help of driver updater software such as Smart Driver Care to update your drivers.