Bad alternator bearings are one of the many problems that can lead to expensive and inconvenient car problems. Before waiting for something bigger to happen, you’re now ahead of the curve by looking up some diagnosis.
You can quickly diagnose an alternator bearing failure by a few symptoms: whine, squeak, grinding or knocking, which gets worse when you go faster. In addition, dim room lights, dim headlights, electronic devices not working properly, or dead batteries are all symptoms. It’s much cheaper to replace the bearings yourself than to spend money to go to the store to replace the entire alternator (they will usually highly recommend replacing the bearings, not just replacing them).
To make your life easier, I’ve put together this simple guide to help you diagnose alternator bearing failure. I’ll start with some definitions, show you the sounds and signs to look for, understand the cost of replacement, and even guide you through the process of replacing a damaged alternator bearing. You’re fine right now.
What is Alternator?
Think about your phone. When the battery is low, you plug it in, charge the battery, and then you can go back to scrolling cat videos online.
In a car, you have a big battery on the front that can power almost everything, but you’ll never plug a gas-powered car into a wall. Why not? Because of the generator.
The alternator is a small motor that spins while the engine is running. Its main purpose is to recharge the battery and keep it alive. Part of checking the health of your battery is making sure the alternator is working properly.

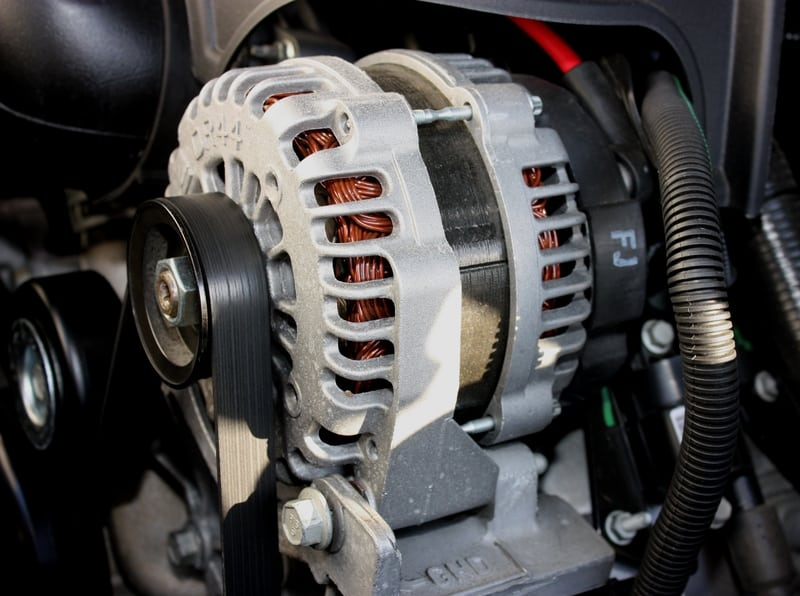
Automotive alternators
In fact, even when you’re idle, the battery is charging thanks to the alternator. Of course, it doesn’t charge very quickly, but it continues.
The alternator is connected to your car’s engine by a pulley that surrounds the alternator rotor shaft.
What is an alternator bearing?
All bearings seek to achieve one goal: to reduce friction in the system. When the object moves, friction takes away some of the energy. It also wears out parts that come into contact with each other, damaging them over time.
Since there is less friction, the transfer of energy is also more efficient. The bearings on the alternator are used to ensure that the rotor shaft gets all possible energy from the pulleys connected to the engine.
What are the disadvantages of a bad alternator bearing?
If the alternator bearing is in bad shape enough, your battery won’t get the charge it needs. As a result, your battery will slowly lose charge until it is completely drained.
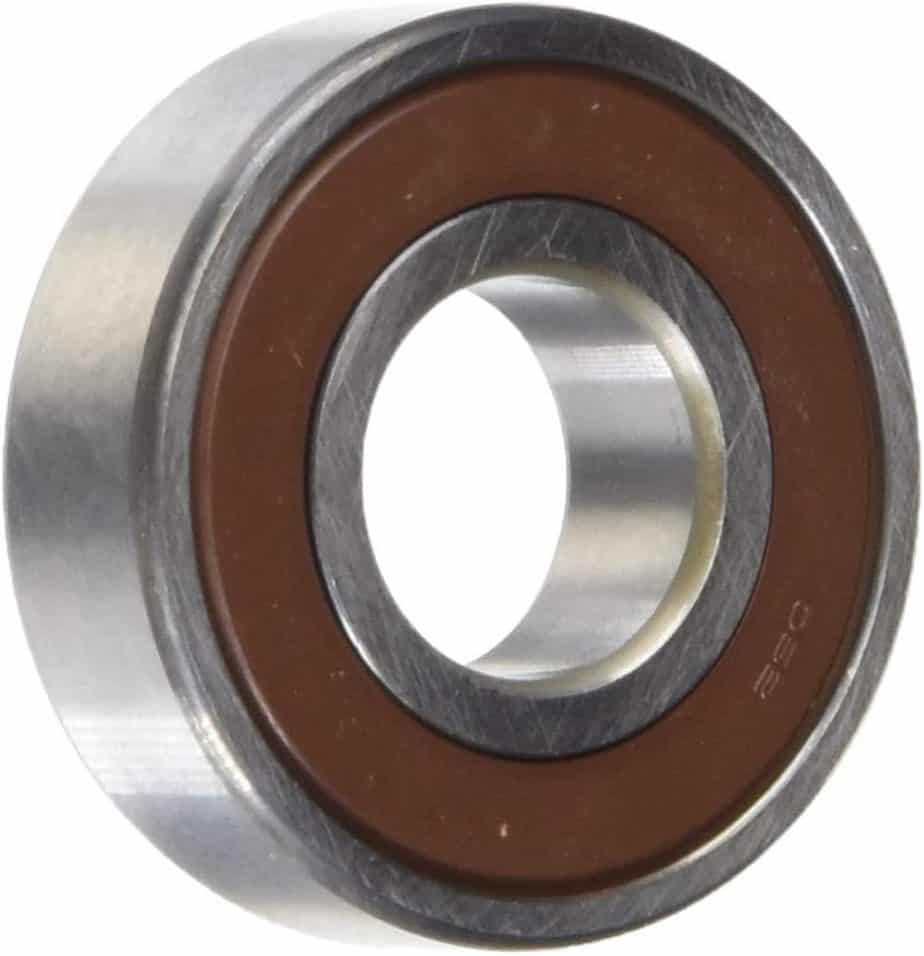
Automotive alternator bearings
In addition, poor bearings can lead to rapid wear and damage to components within the alternator and engine.
Some of the damage that can be caused by alternator bearing damage include:
- Dead battery
- Damaged alternator
- Accelerated engine wear
This is a costly problem if not corrected quickly. Speaking of which, how do you know if your generator bearing is broken?
How to diagnose a damaged alternator bearing
Luckily, you’ll need to look for something a little different. In this section, I’m just going to talk about diagnosing the bearing and finding out if it’s the culprit. Later, I’ll talk about how to actually replace it.
Voices worth listening to
I always like to start with my ears. It’s a quick way to narrow down your search once you open the hood. In the case of alternator bearings, there are a large number of different noises that need to be checked.
Whirring
A shrill whirring sound is never a good sign. If you hear it while the car is moving, focus on the sound as you accelerate. If the whine gets higher as the RPM increases, then the bearing or pulley may be hit.
Squeak
If you hear a squeak, either there are rats in your car or your alternator bearing is trying to call for help. Usually, a squeak indicates a loose bearing rather than a loose one, but it’s still a good idea to replace it here.
You may notice that the squeak gets louder and louder as the speed increases. It should be a rhythmic squeak as it is associated with a round, rotating alternator shaft.

grind
Another annoying noise to watch out for is the grinding sound. If it’s really an alternator bearing, that gets louder as the speed increases.
There was a knock on the door
If the bearing shakes while rotating, it may cause some knocking sounds. They may not be very loud, so you have to keep an eye on the sound.
Signs to check
Whether you notice the noise or not, it’s also a good idea to check for some of these signs. They may appear without any sound, or they may be present with screams or whines.
Dim interior lighting
When you’re driving around, look at the lights inside the car. This refers to the ceiling lights, dashboards, and lights associated with the visor mirrors.
If they look darker than normal, you can suspect your alternator bearings. If the dashboard light is dim but the other lights are normal, check the nearby watch face or settings to change the brightness of the dashboard light. Sometimes this happens after taking your car to a repair shop or car wash.
Dashboard warning light
A clear sign that something is wrong with your alternator is a battery or generator warning light popping up on your dashboard. Of course, these lights indicate a problem with the battery, alternator, or both.
Dim or flashing headlights
If the road ahead looks darker than usual, your headlights may be dim. More obviously, if your headlights are flashing, then the alternator could be the culprit.

In either case, you should park your car in a safe place as soon as possible. You might even consider parking your car on the side of the road and calling an Uber home.
Driving in the dark without headlights means you can’t see the obstacle (or road) ahead of you, and other drivers can’t see your arrival. It’s a huge security risk, not to mention super illegal.
The battery is dead
As I mentioned earlier, your alternator can charge the battery. According to this logic, a dead battery is most likely due to a faulty alternator or bearing.
Follow my guide to tell if your battery is dead or almost dead, and find out if there is a problem with the alternator bearing.
Your car randomly stalls while driving
While your car is running, the alternator takes on the heavy lifting while running the electrical components. If your alternator bearing is broken, your car may suddenly stall while on the move or after a successful start.
Your car may start because the battery still has enough charge, but it will stall because the alternator can’t keep up.

You smell things burning
If your bearings are bad enough to damage the alternator or the alternator belt is broken, you may smell burning. If you’re familiar with that smell, it usually smells like burning electronics. Or, you can smell the burning rubber.
Electrical parts show funny
In the end, the inspection is just the electronic parts that behave strangely. If your power windows take longer to roll up and down, that’s a red flag. If the alternator bearing is broken, the power seat or power lock may not work properly.
Find yourself
How to diagnose a damaged alternator bearing? Some people don’t want to look for symptoms in their daily driving, they want to look for themselves. For you, there are a few steps you can follow to determine if it’s really a bad alternator bearing that’s causing your problem.
Step 1: Kill the engine
When troubleshooting alternator bearings, I want to highlight some safety. First of all, it’s a system in your car where dangerously high currents flow. In addition, there are a lot of quick moves that can seriously hurt you.
It is very important to turn off the engine and remove the key from the ignition and put it in your pocket.

Turn off the car
Step 2: Open the hood and locate the alternator
How to replace the car alternator bearing?The car is turned off and the hood is opened. Find your alternator. Don’t know where to look? It’s going to be connected to your engine, so find your engine first. You know, that huge piece of metal in the middle of the engine compartment?
If you see a big Tesla logo on the front of your car, forget about this article. Electric cars don’t have an alternator, so it’s not your problem.
The alternator is usually located in front of the engine and near the bottom of the engine. You will notice that there is a belt between the engine and the alternator, which is an important sign for you.
Step 3: Turn the alternator by hand and listen
Since the car is turned off, you can turn the alternator manually. When you do, you’ll want to pay attention. Is there a noise when it turns? Is it really hard for the bearing to turn, or does it become difficult when it reaches a certain point in rotation?
These are all signs of alternator bearing damage.

Check the alternator
Step 4: Conduct a “push test”
The last test you can do is the push test. Just push the pulley hub up and down. If you feel movement, it means that the bearing (located behind the hub, behind the housing) is loose and damaged.
The cost of replacing a damaged alternator bearing
If you take your car to a mechanic or dealer to have the bearings repaired, they will almost only try to replace the entire alternator. In this case, you’re looking at bills for hundreds or even a thousand dollars.
If you’re making repairs yourself, you’ll need to allow plenty of time to replace the damaged alternator bearing. Repairs cost around $20, though. Alternatively, you can purchase a replacement OEM alternator from the dump and replace the entire unit yourself.
How to replace an alternator bearing in an automobile
For my ambitious readers, here’s a quick walkthrough on how to replace an alternator bearing on your own. Keep in mind that if you choose to replace the entire alternator and not just the bearings, the starting steps are the same.
Why am I even mentioning replacing the entire alternator? Well, you’re going to remove the alternator anyway to get to the bearings.
Step 1: Disconnect the battery
I don’t want you to accidentally get shocked or turn on the alternator during this step. To avoid major problems, simply disconnect the battery.

Disconnect the car battery
You will notice that there are two leads connected to the terminals of the battery. Remove these and your battery will be completely disconnected. Do this with insulated gloves on, never straddle the wrench between the two terminals. In fact, never touch both terminals at the same time.
Once the battery is disconnected, let’s move on.
Step 2: Remove the belt, pulleys, wires
You will notice a pile of junk connected to your alternator. This garbage is necessary for it to do its job, so be very careful when removing these debris.
Start with a serpentine belt. It’s a flat, wide belt with grooves that winds around the alternator and nearby components.

Automotive pulley tensioner
How do you remove it? There is a tensioner wheel nearby with a bolt on it. Loosen the strap until you can easily remove the serpentine belt. If it looks a mess, consider replacing it as well.
At the back of the alternator, you will find a number of wires. I recommend taking a photo of how they are connected so you know how to reconnect them. Using the picture on your phone, completely disconnect all wires from the alternator itself. It’s easier than following them, finding where they’re going, and disconnecting them there.
Step 3: Disconnect and remove the alternator
Each alternator has a different number of mounting bolts. These bolts pass through the alternator and connect them to the support structure around the parts, holding them in place.
Look around the alternator and look for the bolts that run through the alternator and connect to other parts on the outside.
Kill two birds with one stone and see how tight each of these bolts is. If they are loose, this could be another reason why you are seeing symptoms of alternator bearing failure.
Remove all bolts completely. Your alternator can now be removed freely.

Disassemble the alternator
This is also the stage where you have to decide if you want to replace only the bearings or if you want to replace the entire alternator. You will notice that the alternator is now completely disconnected and about to fall off.
Some people will skip the next step and just install a brand new alternator to reduce the loss. This is the difference between a $20 bearing and an alternator between $80 and $250. For example, by the way, a new generator for a 2005 Civic costs $82 on Amazon and $25 for a replacement bearing.
Step 4: Find a nice place to work
Before taking it out, go ahead and find a good place to dispose of the alternator. I use my shop table in my garage. You’ll need a surface with enough space to put down the alternator and start taking it apart.
The alternator weighs around 10 or 15 pounds, so you don’t need a very sturdy place to place it.
Remove the alternator and bring it to the workplace with the tools you need.
Step 5: Remove the bolts and screws
You can’t see the bearing at the moment, it’s hidden inside the alternator. You need to remove the shell on the side of the pulley hub.
First, you’ll need to remove the large nut that holds the pulley hub in place. You may need a blaster gun to do this, as it will really be slowed down.

Repair the alternator
Once the nuts are removed, remove any bolts that hold the housing together. The bearing is immediately inside the housing and may be pressed into the housing. This means that separating the two halves of the enclosure will not be a breeze.
Step 6: Access the bearings
The best way to contact the bearing is to strike the shaft from the front. Use a rubber hammer or plastic products that will not deform the shaft.
Keep in mind that your alternator has bearings on both sides of the rotor. You’re concerned about the surface of the pulleys, but you can still test and replace them.
After removing the housing, you will end up seeing the bearings. Since they are pressed, you will need to use the mallet again to remove the bearings.
Step 7: Replace the bearing
Once the bearing has been removed, replacing it is simple. Place it on the rotor shaft and hammer it back into place with a mallet.
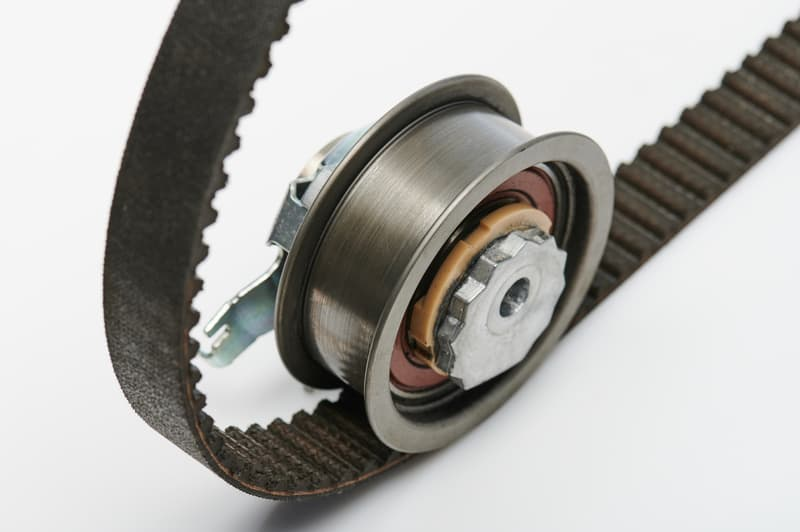
Generator bearings and belts
Step 8: Put it back in its place and reinstall it
How do I change a car alternator bearing? Now, just reverse the steps and put everything back together. Take your time in the process. If you miss a bolt or wire, the result may be more than just a broken bearing.
When rewiring the alternator, refer to the photos of the wiring you took earlier.
Once everything has been reinstalled, turn the car key and pat you on the back when it starts successfully. If the car doesn’t ignite, you can do what I often do – pretend there’s no problem, double-check your work, get disheartened, and tow the car to the shop for them to fix.
Conclusion
I’ve just covered how to diagnose a damaged alternator bearing, the costs associated with replacing it, and how to replace it yourself. If you need more car care guides, check out my blog. Also, consider some great products that make owning a car easier.