It’s better to learn how to replace the lower control arm bushing when the parts wear out than to regret it later. The lower control arm consists of two rubber bushings, a metal frame, and a ball joint. The lower arm control is located between the frame and the spindle or hub.
Every vehicle has these arms; However, the quantity can vary. As the front wheel passes through potholes or other obstacles on the pavement, the arms remain swinging up and down. Let’s move on to the replacement –
How to Replace the Lower Control Arm Bushing: A Step-wise Guide
Regularly withstand road conditions and driving behavior to bring the control arm and its components to an end. As a result, the parts wear out and the bushings fall apart. Keep in mind that it is not safe to drive with the lower control arm malfunctioning or the bushing wearing; Read how to replace the lower control arm bushing here.
Control Arm Bushing Replacement Tutorial: Start by removing the ball and socket joint and anti-roll bar linkage
The ball joint must be removed to begin using the replacement. Use a wrench of about 20 mm to 24 mm to remove the cotter pin to contact the ball joint. Once the ball and socket joint is removed, you will need to lower the control arm by tapping the spindle with a hammer so that the lower control arm bushing can be properly replaced.
Now you need to remove the stick link so it doesn’t get in your way. Here, you’ll need a 14mm or 15mm wrench or socket, and if you see a suitable mini-taper there, you may need to hammer it like a hammer ball knot.
This way, the joystick link will be removed and you can remove it from the lower control arm bracket. Now you’re ready to take the next step.
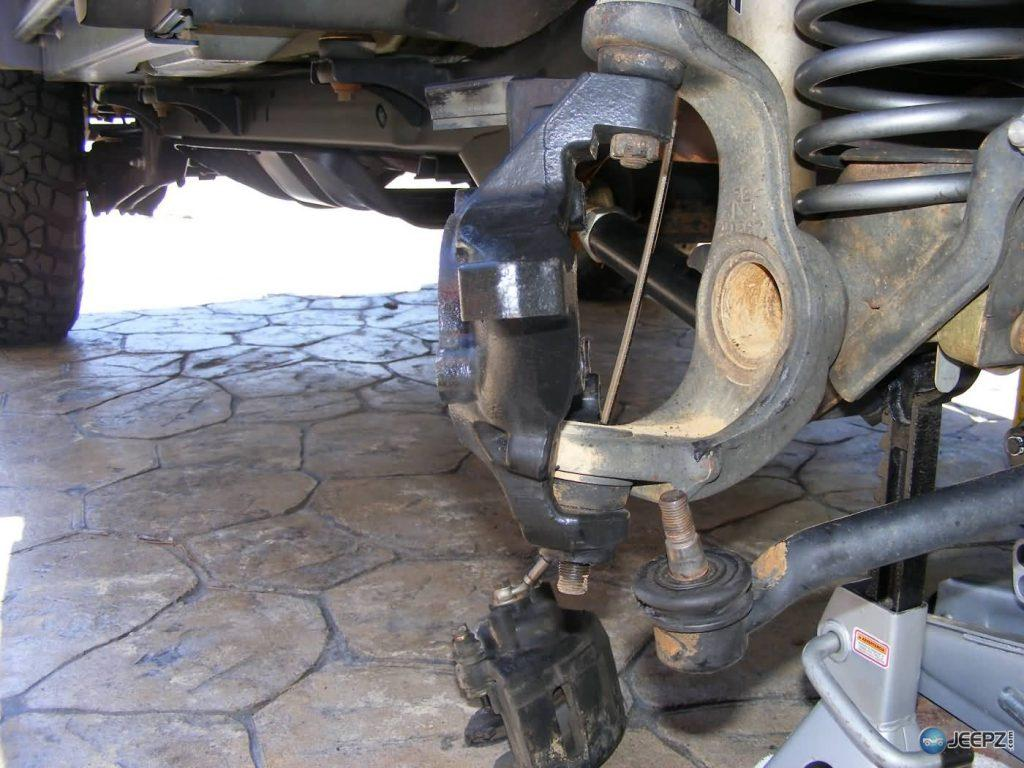
The bushing supports the function of the lower control arm (Image source: Jeepz)
Remove the control mounting bolts and lower control arms
Use a 19mm to 22mm wrench or socket wrench to remove the control arm mounting bolts. In some cases, you may need to grasp the nut on the back of the bolt to loosen it. Once the rear control arm bolt is removed, the lower control arm can be easily removed. If the control arm seems to be grabbed by the frame, you can apply some force.
Reinstall the lower control arm
How do I replace the lower control arm bushing? Once you’ve decided that you need to replace the lower control arm, it’s time to purchase a new one. You can buy it online or offline. When buying online, enter the year, make, and model to find the perfect replacement part. You can also take your car to a repair shop for a professional replacement. You can purchase the entire replacement kit or purchase the lower control arm specifically.
Once the control arm is removed, it’s time to install a new one. Make sure to look at the bolt holes while aligning the arms so that the arms are properly secured there. After inserting the control arm, get the mounting bolt and secure it by hand. When all the blots are there, you can use a wrench to tighten them.
Put everything back in its place, such as the anti-roll bar linkage, and use fastening bolts to secure it there. It’s time to tighten the lower ball joint using the same wrench you used to loosen it. Now insert the cotter pin and you’re done in order.
Finally, you can reinstall the wheels and use the jack to lower your car. Start your car and listen for any noises that don’t feel normal. There should be no noise, and if there is, it may indicate that the installation needs to be rechecked.

A pair of control arm kits can be ordered both online and offline (Image source: YouTube)
Control Arm Bushing Replacement Tutorial: Replacing the Bushing
If you are replacing the entire lower control arm, then the above steps will help. However, if you only want to replace the control arm bushing, consider following the steps above. At the same time, you’ll get more car maintenance tips and in-depth knowledge written by experts.
Torn bushings overworked the control arm and caused irregular tire wear. In order to stop the damage immediately, it is necessary to bring a new pair of bushings and replace them. Keep in mind that for the same installation, the new sleeve pair should match the old sleeve.
Pay attention to the position and alignment of the old bushing beforehand so as not to miss the new bushing. You need to press to remove the old bushing and install the new one. Make sure that the bent part of the bushing is in the same position as before so that it can work as intended.
Using a pressure cone and pressure cup, you can push the bushing to detach from the arm. You can hear a pop when the bushing detaches, which allows the bushing to be completely removed from the arm. Follow the markings you noticed and place this new bushing into the lower control arm.
Remember!
Note: Do not lubricate the bushing housing, otherwise it will slide around and the bushing will not fit well.
Once you have properly secured the bushing there, apply force throughout the place so that the bushing is securely held in place. Repeat the same process for all lower control arm bushing replacements.
In most cases, when one control arm is worn, it is likely that all of them are already worn. Therefore, you should check all of them, and even if they don’t look completely worn, you can consider replacing all of them. This way, you won’t be repairing the remaining control arm after a few days. That’s why you should buy a complete control arm kit instead of just one.

Control Arm Bushing Replacement Tutorial: Use a wrench or socket to remove the control arm mounting bolts (Image source: istockphoto)
Conclusion
How do I replace the lower control arm bushing? Replace all control arms for a more balanced ride. We want you to understand how to replace the lower control arm bushing or both parts separately. When in doubt, be sure to give your car to a professional and let him handle the entire replacement process, which will cost you between $280 and $350.